Palma Home Design

Thursday, July 5, 2012

Benched! DIY Bench & Diamond Tuft...Thrifty Find $10

This was one of my BEST finds EVER! A 1970ish oversized coffee table for $10 at my favorite thrift store! It was 50"L x 36"d x 16"h. It had 4 cabinet doors on each side with lots of storage AND the really cute funky medallions on each door-which is the MAIN reason I bought it!
So of course I had to figure out something really cool to turn this into....What about 2 benches for the end of a bed? Why not? So I had my hubby saw it in half.


And then there were 2! I started with the first one and painted it white, plus we added on a back so it would be a true storage bench.                   I LOVE the medalions!


Next I had the hubby cut out a piece of wood that I could upholster, then attach to the top of the bench. I also drilled holes to create my diamond pattern for my tufting.


 I then added the foam and dacron. I have seen several DIY tips for creating the holes in the foam and the drill was not working for me, so I just used my turkey carver for the holes as well as for cutting it to size.I then draped the fabric generously over the foam, and started to push it through the holes.


I took a needle and heavy duty fishing line and sewed through the fabric that was coming through the hole, then pulled tightly and stapled it to the wood


The diamond pattern starts to form automatically but you do need to help the "flaps" form in the direction you want them to lay.


I then attached it to the top of the bench from underneath by pre-drilling and using heavy duty screws. I added a contrasting piping and buttons and voila a beautiful bench for the foot of a lovely bed! Stay tuned for after photos of the clients room it will be going into!


Here's the bench in the finished client's room


Monday, June 11, 2012

What the Tide Drug in....Continued....$1000 Room Redo


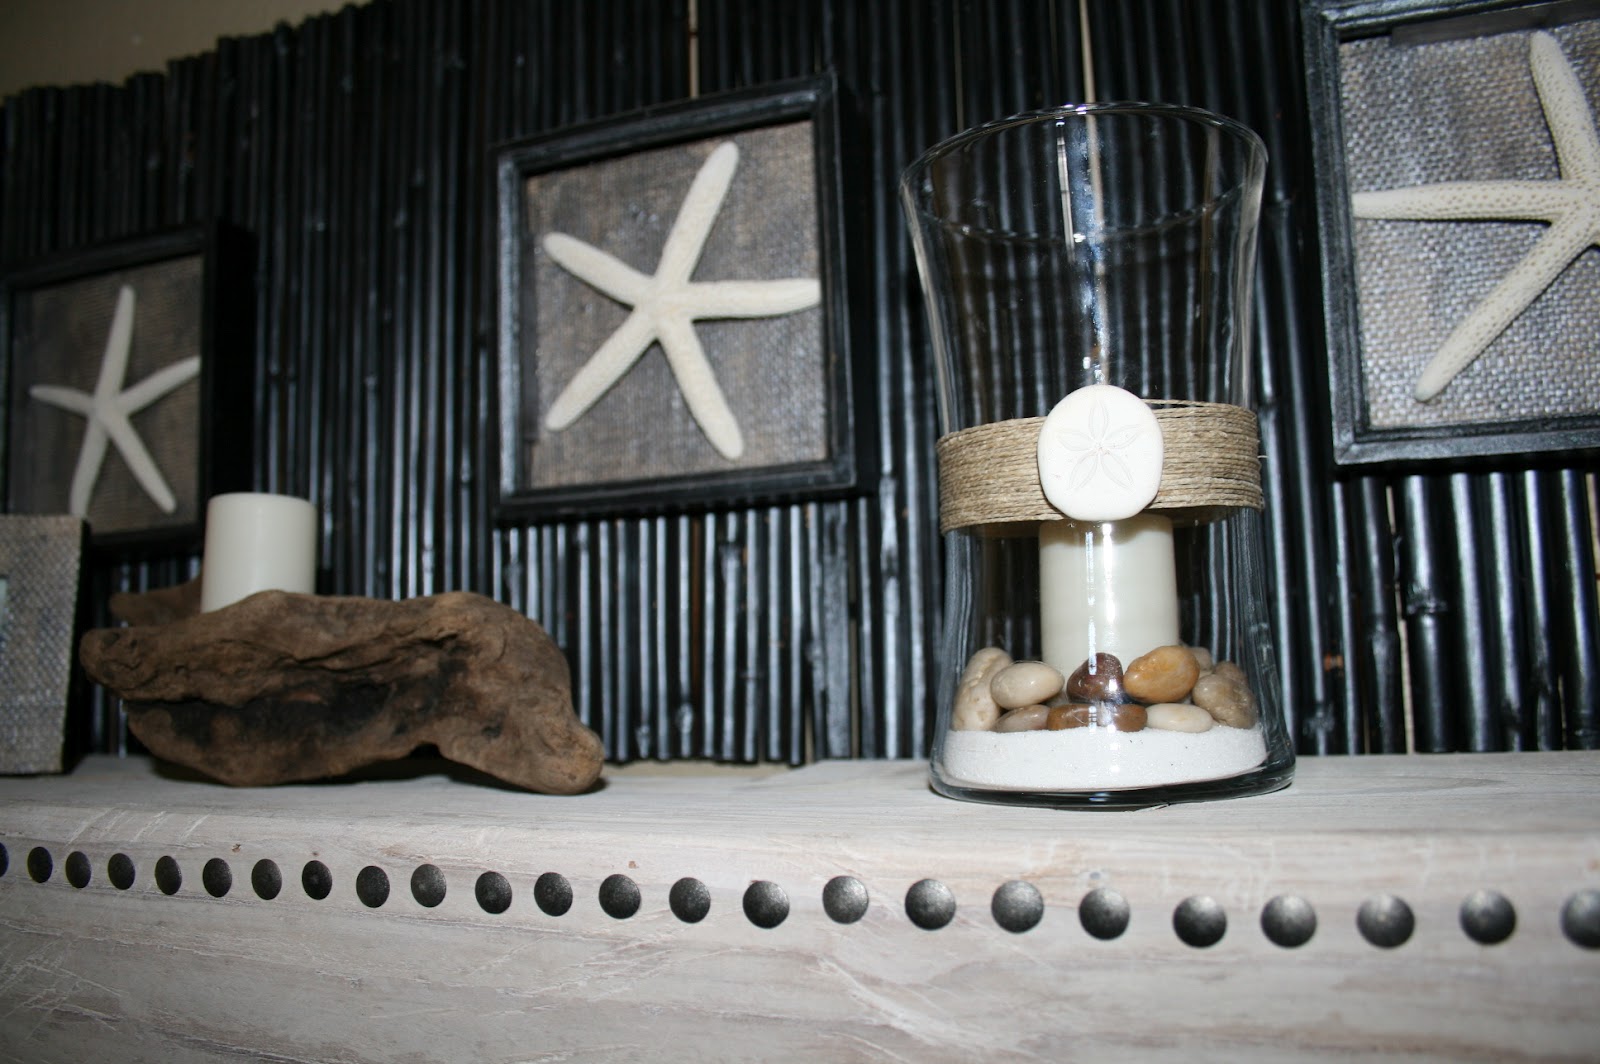
These are the first items I purchased for the fireplace mantel area. They are $4 bamboo place mats from Pier1. I sprayed them black then dry-brushed on a gunmetal silver paint to give it a modern look. These then attached to wall right above the faux wood mantel.


Next I purchased some shadow boxes from the $1 store, took out the back and added grass cloth wallpaper that I also dry-brushed with the gunmetal paint. Then added the white sea stars, I also had already painted the frames black and used the gunmetal around the edges of it as well
Then taking the clients black picture frames, I also added the grass-cloth wall paper to the fronts then dry-brushed the gunmetal over those too.

NOW FOR THE BIG PROJECT!!!!!!!!!    The faux mantel!
I went to the local hardware store and purchased 2 cedar fence posts for $4ea, had them cut them there then came home a nail gunned them all together


Then I got out the knife and wood file started shaving down the edges and creating dips, holes, and then sanded and sanded and sanded!I mixed a water and white paint solution (mostly water) and started to soak the wood over and over ended up doing about 8 coats. I was going for a bleached out by the sun /drift wood looking piece.


Then I took about 100 thumb tacks and stuck them into cardboard then sprayed them with black and silver paint getting a matte silvery finish. Then started to hammer them in on the front of the mantel. I attached "L" brackets on the bottom portion of the mantel so that it could be attached to wall as well as sitting on the brick mantel.


Fireplace color change! This took WAY longer then anticipated! It took 3 hours to paint on the "Kilz" white primer which is the most important step because the paint will just keep soaking into the brick and you will not get the color you want unless this step is taken. Then let it dry, and started to 2 coats of regular interior paint which I chose in a deep gray tone


While letting the coats of primer on the brick dry, I had already cut out coral shapes on the "cricut" and drug out my trusty OLD school projector and just painted the gunmetal paint over the coral pattern on the wall above the fireplace, next to the vinyl wording I had already installed on the wall. 
I also found this really great fabric that had all the colors at "Chameleon's Home" that I made into pillows for the sofa and a valance for over the slider doors.


These clients have used my services for years for pretty much every room in their house they are great to work with, I appreciate them so much! Thanks to the Smith's!


Monday, May 21, 2012

What the Tide Drug in!

So I saw these drift wood garlands at some local home decor places for $30ea, and thought they would be really cool as a curtain in front of a block glass wall at one of my clients homes who is an avid surfer. But of course I felt I needed more than one and since it was a budget room redo, I knew it was something I could make! I found this driftwood on etsy from Scotland so I thought that was cool...(yes people I bought it, I live at the beach but I'm busy and dont have time to go searching for 200+ driftwood twigs :) Here's the link on etsy where you can find them StairLodgeSupplies

 Then I bought these sand dollars from oriental trading co. for $6 which I felt was a score! My Boxer Rosko thought they were a yummy treat :)


I then painted a bamboo stick I had- in black and did a silver finish over the top, then drilled holes through it and attached the 5 garlands, also putting a sand dollar at the top of the pole.


 Heres another view... I wanted to get this post done but I am currently waiting for my camera to come in the mail, and I promise to post better pics of this soon! Plus show you the finished room, along with the fireplace transformation and my $9 wood mantel I made! Please visit my website for all of my before & after transformations! 
Palma Home Design